runningwaterpottery

Just another WordPress.com site

Month: July, 2012

DSC01221

DSC01221

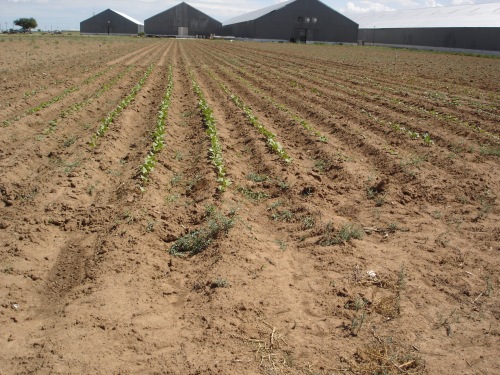
Here is the space where I’m growing a Fall crop. It currently measures about 45’x60′. I have pinto beans, lima beans, beets, yellow squash, zucchini, patty pan squash, and cucumbers planted now. In a few weeks I’ll put in some lettuce, cabbage and (gulp) turnips. Wish me luck! Those crops are new to me…

DSC01219

DSC01219

Here are some of the produce I sold at the Plainview Area Farmers Market this morning. Beginning on the left i had, jalapenos, Anaheim chiles(far top, middle), bell peppers, red onions, sweet banana peppers, (middle) and patty pan squash (bottom).

DSC01216

DSC01216

It’s time to trim the one gallon ollas for my latest order. Once again, I’ll use this old crock as my trimming ‘chuck’. A chuck is like the device on your drill or lathe that holds a bit or object to be trimmed in a position aligned with the axis of the axle that spins the potter’s wheel. The chuck is held in postion with two coils of clay pressed against the wheel head and the base of the crock.

DSC01215

DSC01215

In an earlier post I pointed out some faults in my trimming system where the bare chuck left a ‘bath tub ring’ around the damp clay. I think I’ve solved the problem by using a square piece of foam laid over the hard upper edge of the trimming chuck. The foam is the stuff you lay over your mattress in a feeble attempt to make it softer. The neck of the olla pokes down through the square hole.

DSC01217

DSC01217

Here is an olla set in the chuck and ready to trim. Notice the flat bottom and my finger which is gently applying downward pressure on a plastic bottle top. This keeps the pot centered in the chuck and the plastic reduces drag from my finger, keeping the wheel spinning easily. If I were to use a bare finger on damp clay, it slows the wheel faster than when I use a bottle cap.

DSC01214

DSC01214

A one gallon olla that has been trimmed in the chuck. All of that little pile of clay was trimmed away to make the bottom round.

DSC01218

DSC01218

Here are some of the finished one gallon ollas drying out after trimming the bottoms.

DSC01212

DSC01212

Here are some of the one gallon ollas made just like the pint sized. I should trim them today and have them ready to deliver to the Master Gardener class next week. This coming Thursday, the class will meet here at school and actually hand build some pint sized ollas using either the pinch or pressmold process. That should be loads of fun!

DSC01213

DSC01213

This photo should give you an idea of the size of the ollas in the image below. These should hold about a pint, probably a little more. You can also carry them, with the lid on, by grasping them either around the neck or from above, with your palm on top of the lid and fingers around the neck. In the UK, they would say such a design ‘affords one a greater degree of purchase’ than my previous, straight neck design. Perhaps it was worth considering a change; time will tell.

DSC01211

DSC01211

Yesterday, I got back to making more ollas. I changed the design a little and I’m experimenting with getting my volume more accurate. I didn’t really like the straight neck with the ‘cup’ type of lid. I think it’s what you want with an olla that is used to cool your water but for one that goes in the ground, I think a more ‘organic’ form is proper. So, these guys look a little gourdish.
Another concern was being able to carry an olla with one hand. The straight necked one would require you to carry it in your palm or grasp it around the neck, requiring a certain amount of grip strength. With the flared rim, you should be able to carry it much easier. Plus, the flared rim will allow you to store it upside down. The round bottom tends to make them roll. Maybe it will help solve that issue also.
As for volume; I wanted to get more accurate so I found a 1 U.S. pint jar and slid it down into the clay cylinder while I was making the first new olla on the potters wheel. It fit with room to spare so I just made the vessel a little taller and added some shape to it. I’ll call these ‘One Pint’ sized. They should hold more than a pint but I think I’ve found a simple and more accurate way to describe my sizes. Once I get them fired, I’ll fill one up with a measuring cup and see how much water it holds.